There’s no doubt that the Aeropress is one of the best coffee brewers around. It’s extremely durable, it brews a killer cup, and it’s compact enough for the most minimal travelers. However, it does have one weakness: it’s only meant to brew 8oz of coffee at a time.
But, if you really want to brew two cups at once using the Aeropress, there are ways… two, in fact. Purists may say that brewing coffee two different times is the only way to make two cups of Aeropress coffee, but we’re not convinced.
Actually, we believe these two methods, though a little more difficult than your average Aeropress routine, can brew coffee just as good as any other recipe.
Read: The Ultimate Guide To Aeropress Coffee
Let’s take a look at these two methods for brewing Aeropress coffee for two people.
The Challenge, The Approach
Here’s the issue: the Aeropress can only hold ~250ml of water at a time (roughly 8oz). In order to brew two cups of coffee, you have to be able to brew ~430ml in one session. See the problem?
So there are really only two directions we can go:
- Brew a concentrated coffee and dilute with water
- Brew pour over style to hack the volume limitations
We’ll show you both methods so that you can pick the one that’s best suited for your coffee habits and equipment.
Read: 5 Things Every Aeropress User Should Know
1. The Dilution Method
With this method, you’re essentially going to brew a concentrated form of Aeropress coffee, which you’ll dilute with hot water once the brewing is complete.
This process works because, even though you are using a crazy 1:7 ratio, the longer steep time and the element of pressure allow the coffee to reach a balanced extraction. However, even though the extraction is tasty, the strength is not (which is why you will dilute).
Here’s what you’ll need:
- Aeropress
- 500ml Hot Water
- 36g Coffee Beans
- Server/Carafe
- Two Cups
Step 1: Bring 500ml of water to a boil and grind 36g of coffee (essentially x2 the normal amount) at a medium setting.
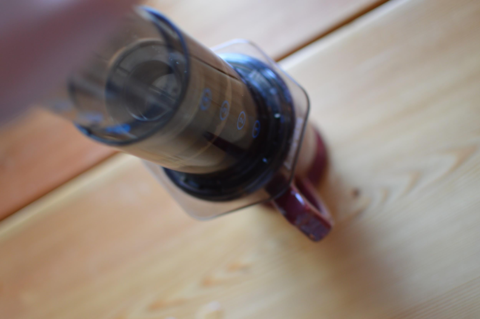
Step 2: Assemble the Aeropress—inverted style—and pour the grounds into the brewing chamber.
Step 3: Start a stopwatch and begin filling the Aeropress with water. Leave a small amount of room for stirring.
Step 4: At 0:30, insert the Aeropress stirring paddle and move it in gentle circles for fifteen seconds. Make sure all the grounds are well saturated, then fill the chamber to the very top with an extra bit of water. Now rest.
Step 5: At 2:00, attach the Aeropress filter, flip the device over onto your server/carafe, and begin to slowly plunge for 30-45 seconds. Stop once you hear the hissing from the filter.
Read: A Recipe For Aeropress Espresso - Or As Close As You Can Get
Step 6: Take your brewed coffee (around 215ml or so) and dilute with another 215ml of hot water. You should now have 430ml of brewed coffee at a strength and flavor similar to what you’re used to.
Step 7: Pour and enjoy.
Troubleshooting The Dilution Method
If your coffee comes out on the weak side, it’s possible that your coffee didn’t brew at a x2 concentrate and so diluting 1:1 with water was too much dilution. Try either diluting with less water next time or grinding slightly finer to increase the initial concentration of the brew.
If your coffee comes out sour, chances are it is under extracted. This means that, since there were so many coffee grounds being brewed, not every coffee particle was able to be extracted from at the right amount (thus, under extraction). Try a slightly finer grind setting or a longer steep time next time to increase the extraction.
Read: 3 Reasons You Need A Coffee Scale To Brew Coffee
2. The Pour Over Method
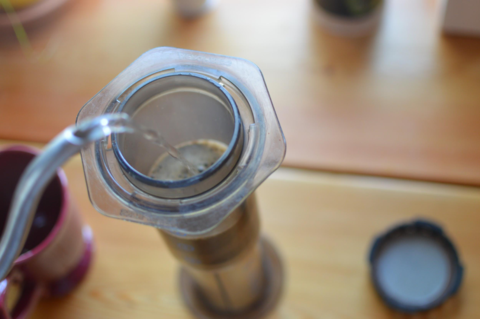
This approach to making two cups of Aeropress coffee at one time more so resembles a pour over recipe than an Aeropress one. You’re essentially going to forego the device’s immersion design and pretend it’s a pour over cone.
This is difficult because most Aeropress filters don’t drain fast enough for pour over brewing. So, to make sure you don’t over extract from the slow draining, you’re going to use a coarse grind setting. It’s weird, but it works.
Here’s what you’ll need:
- Aeropress (and, ideally, a metal filter)
- 550ml Hot Water
- 33g Coffee Beans
- Coffee Scale
- Slow-Pouring Kettle
- Server/Carafe
- Two Cups
Step 1: Bring 550ml of water to a boil and grind 32g of coffee at a coarse setting.
Step 2: Assemble the Aeropress—normal style—with your filter of choice facing down into a server/carafe. Metal filters tend to drain faster, which may help you accomplish a better extraction. Pour the grounds into the brewing chamber.
Step 3: Start a stopwatch and, using a kettle with a high degree of control, pour 70g (same as 70ml) of hot water over the grounds. Make sure all the grounds are saturated. Then rest.
Read: A Recipe For Shaken Iced Aeropress Coffee
Step 4: At 0:30, begin pouring water slowly in a way that continues to saturate all the grounds in the Aeropress. Brewed coffee should begin draining slowly into the server/carafe.
Step 5: Once you’ve poured 200g of water around 1:30, insert the Aeropress stirrer and stir gently for just ten seconds. Continue pouring slowly.
Step 6: Once you’ve poured the full 550g of water around 3:00, insert the Aeropress plunger and begin to push down slowly. It should take you 30-45 seconds to finish plunging—stop once you hear the hissing.
Step 7: Pour your two cups of coffee and enjoy.
Troubleshooting The Pour Over Method
If your coffee tastes weak, watery, or drained too fast, try a slightly finer grind setting next time to bring out some more flavor and balance.
If your coffee tastes too strong or bitter, it’s likely that your brew is over extracted. To produce a more balanced extraction next time, try a coarser grind setting or pouring a little faster to reduce the total brew time.
Read: Take Your Aeropress Camping For Easy Outdoor Coffee
---
See? We told you it can be done!
Though you’ll probably need to play around with these two recipes to get coffee that’s just as satisfying as ever, it’s totally possible.
Just keep in mind that, the lower quality coffee beans you use, the harder it will be to make your brew taste delicious. On the flip side, freshly roasted, specialty grade beans tend to be pretty forgiving, especially when it comes to odd methods like these.


